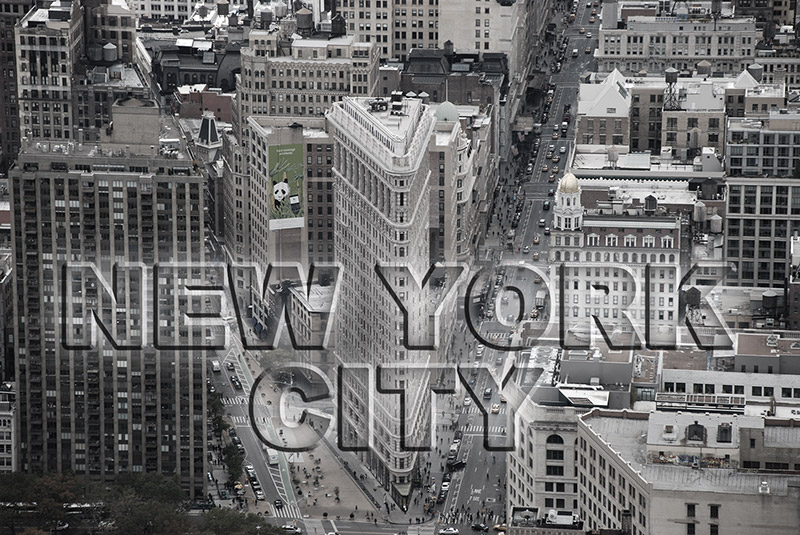
This effect on an image is a great way to add headlines without obscuring any part of the image, it would be useful for slideshows or large images, and is just a little different from plain black or white headline text. This tutorial can be done on any CS version of Photoshop, and an image is the only resource required, and is explained in 7 easy steps.
Resources:
Photoshop CS and above.
The image used for this tutorial is from GraphicStock – New York City. You can download this image from GraphicStock amongst several others. In fact, they have 250,000 graphics, images, vectors that you can choose from. They have an incredible offer right now, to give you 7 days of free downloads. Just sign up, and you’re well on your way for this tutorial.
Step 1
Open the image you are using. You should keep the image quite large – I reduced the size to 1500px wide.
Duplicate the background layer.
Step 2
Create a Black & White adjustment layer. The settings throughout this tutorial are going to depend somewhat on the image you are using. I kept the Black & White default settings and lowered the layer opacity to 75%.
Merge the adjustment layer and the image copy layer together.
Step 3
Select the Type Tool, set the foreground to any color, I used Arial Black at 200pt. The image below shows the text settings used here:
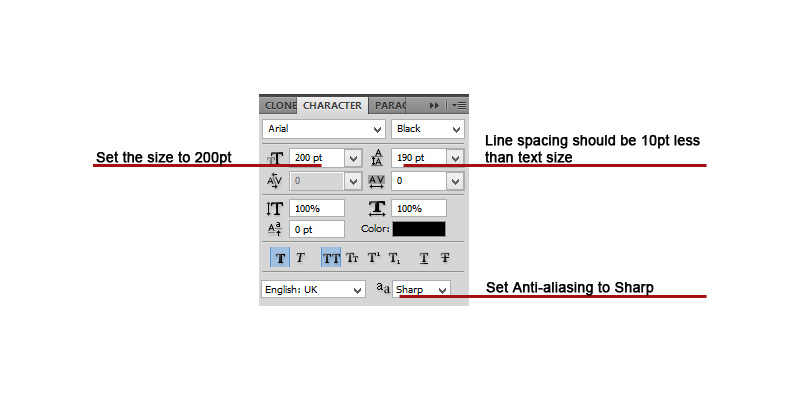
Type your text and place it exactly where you want it – it is very important that you don’t move it after the next step.
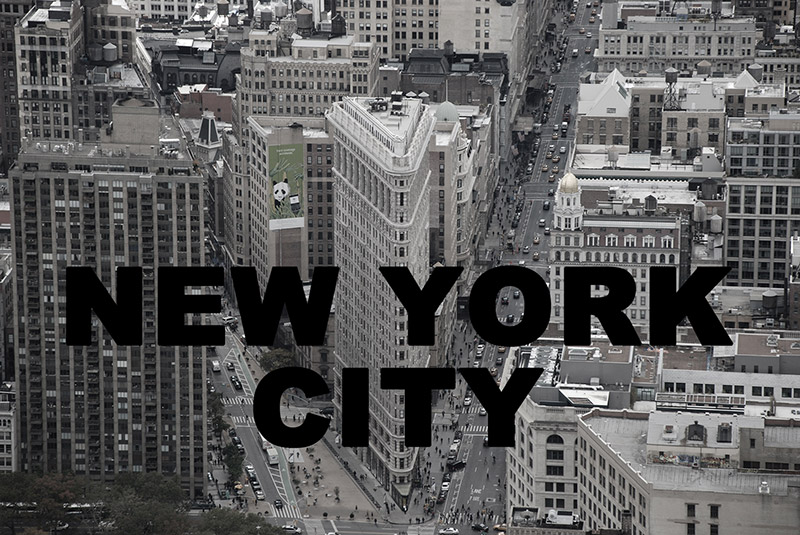
Step 4
Hold down the Ctrl key and click on the thumbnail of the text layer in the layers palette to select the pixels.
Make the copy of the image active, Ctrl + J – you should now have the text on a new layer above the image, and you can now either delete the text layer or simply turn off the visibility.
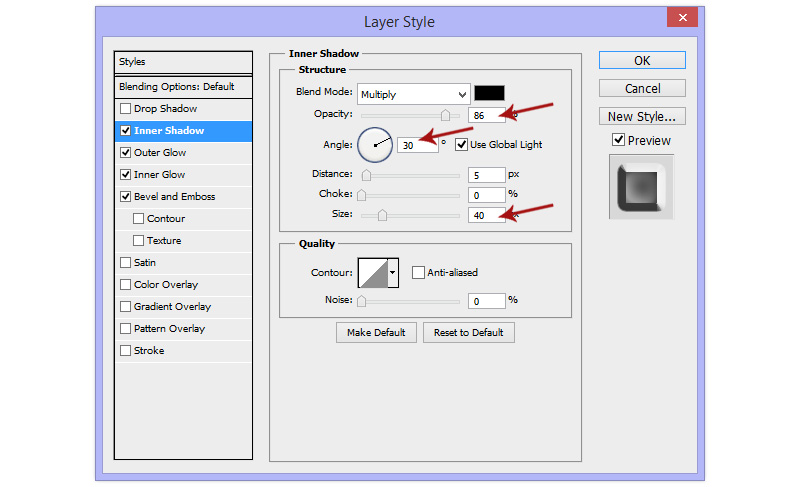
Step 5
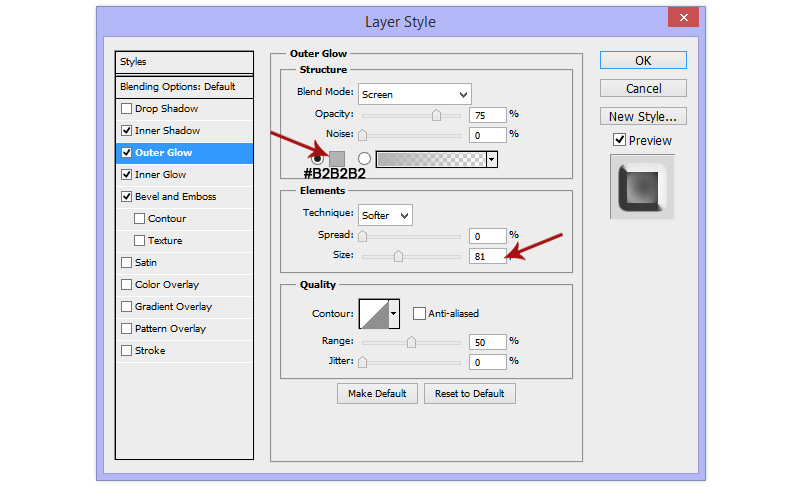
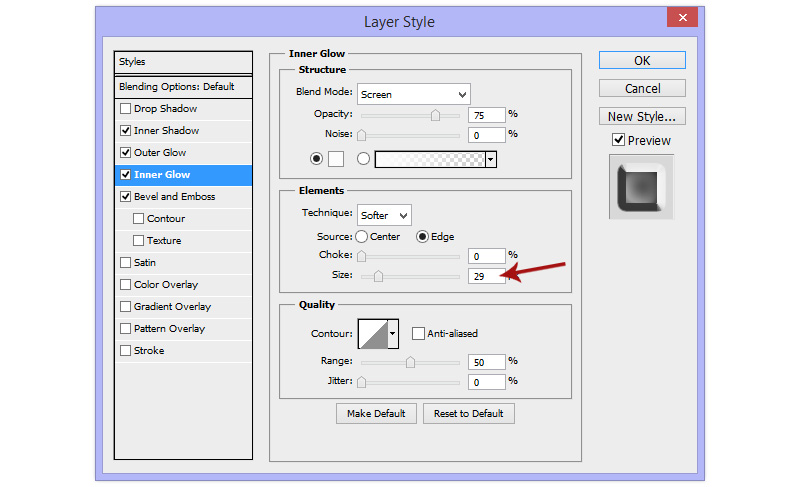
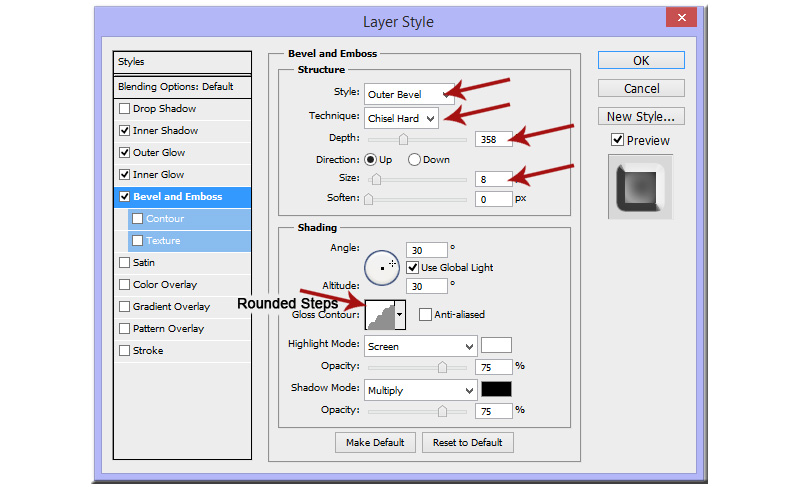
On this new layer you have just created, apply the following Inner Shadow, Outer Glow, Inner Glow and Bevel and Emboss settings:
Step 6
Add a Brightness/Contrast adjustment layer clipped to the stylized text layer – the easiest way to do this is: Hold down the Alt button, click and hold down the left mouse button on the half black, half white circle icon at the bottom of the layers palette, highlight the Brightness/Contrast option and release the mouse button. You will see a dialog box that will ask if you want to ‘Use previous layer to create clipping mask’ – make sure the box is checked and click OK.
Slide the brightness slider to around 90 and leave the contrast slider at 0.
Step 7
Duplicate the copy image layer and drag it above the Brightness/Contrast layer you have just created.
Set the layer mode to Overlay and reduce the opacity to around 20%.
Final Result
And you’re done… it’s as easy as that!!