
BigCommerce is a headless eCommerce solution that allows you to build storefronts on different platforms. Each storefront acts as a separate channel so that you can sell your products on eBay, Amazon, WordPress, and several other places at the same time. Besides, BigCommerce also provides you with an in-app online store that you can choose to keep either public or private.
In this step-by-step tutorial, we will have a look at how you can integrate BigCommerce with your WordPress site. However, WordPress is just one of the channels you have access to, so you can easily expand your online presence to other platforms and marketplaces as well. Note that you need to set up every channel separately, as each has its unique login flow and configurations.
How Does BigCommerce and WordPress Work Together?
The main goal of headless eCommerce is enabling multiple front-end experiences for the same back-end. In this way, you can manage all eCommerce logic such as catalogs, orders, and checkout at one place.
When you are using WordPress and BigCommerce together, the former serves as the content engine, while the latter works as the commerce engine. The biggest advantages of this solution are performance and scalability. As all back-end functionalities are handled by BigCommerce’s servers, your WordPress site won’t slow down even if you have thousands of products.
And, while you do have to pay for BigCommerce, you can save a lot on server space. This is because BigCommerce is a SaaS (Software as a Service) platform where the service provider takes care of all hosting and server-related things. BigCommerce communicates with your WordPress site through its API.
Install the WordPress Plugin
To get BigCommerce up and running on your WordPress site, you need to go through the following workflow:
- install the BigCommerce For WordPress plugin,
- create a BigCommerce account,
- connect your account to the WordPress site.
Note that you need to have at least PHP 5.6.24 on your WordPress site, otherwise the API won’t be able to connect the two platforms.
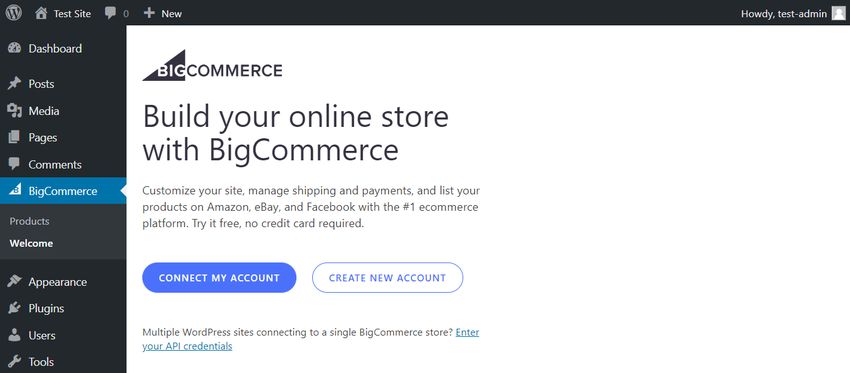
You can install the plugin from the Plugins > Add New menu of your WordPress admin area. After activating it, a new BigCommerce menu will appear in the left sidebar. Click the Welcome submenu to connect the WordPress site to your BigCommerce account.
Connect BigCommerce to WordPress
If you don’t yet have a BigCommerce account, you can create one right from your WordPress admin area. On the Welcome page, both the Connect My Account and Create New Account buttons trigger a pop-up where you can access the BigCommerce interface.
While the WordPress plugin is free, BigCommerce is premium software that comes with a 15-day free trial. Plans start from $29.95/month (up to $50k online sales per year) and grow gradually. The plugin will ask you to start your free trial, which you can do without giving away your credit card details.
You need to add your email address, create a password, and find a name for your store as well. When you click the Finish button, BigCommerce will redirect you to the dashboard of your new store. This is where you can manage all eCommerce functionalities. The two platforms will be synced at regular intervals: five minutes by default, but you can change it in the settings.

Set Up a WordPress Channel
Now, you have access to both platforms (WordPress and BigCommerce), but they still don’t communicate with each other. To connect them, you need to set up your WordPress site as a BigCommerce channel.
The easiest way to do this is by using the plugin’s Welcome menu in your WP admin area. The integration process is automated and really straightforward. In the Channel Settings, create a new channel for WordPress and wait until the plugin connects your site with your store back-end through the BigCommerce API.
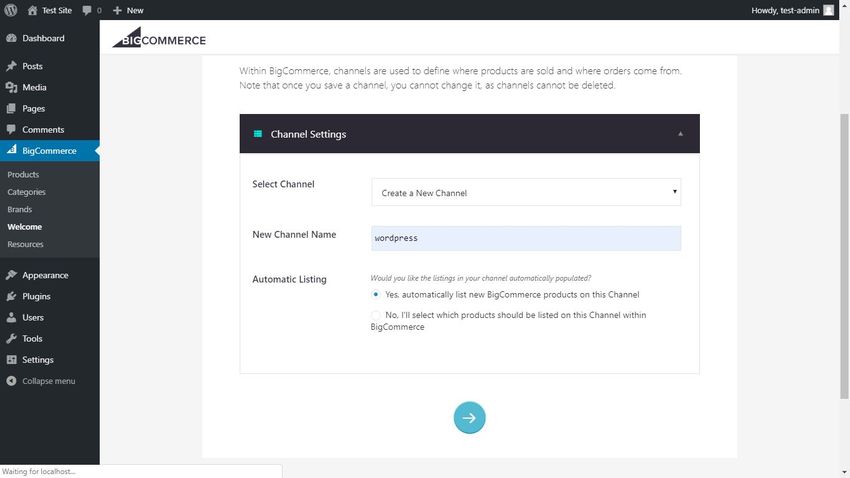
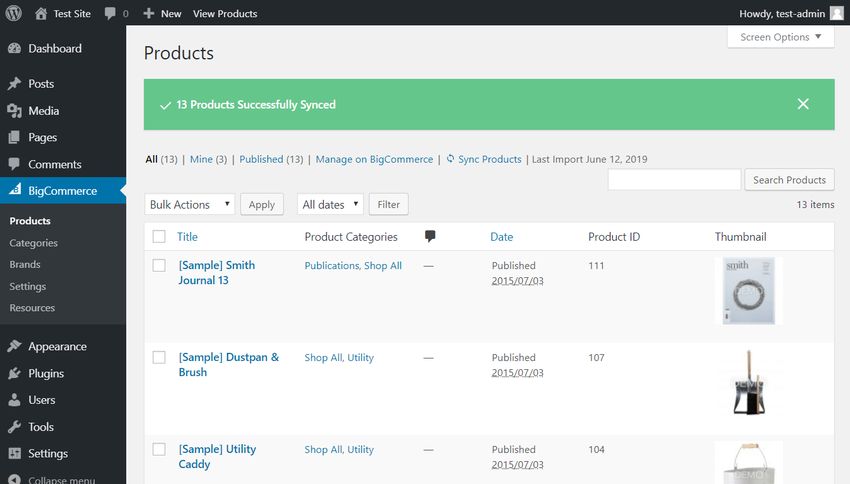
You can opt for Automatic Listing in the Channel Settings. This means that your BigCommerce products will be automatically listed on your WordPress site as a custom post type called Product, created by the plugin. If you don’t yet have any products uploaded to your BigCommerce store, the plugin will list the 13 sample products that come by default with every new BigCommerce install.
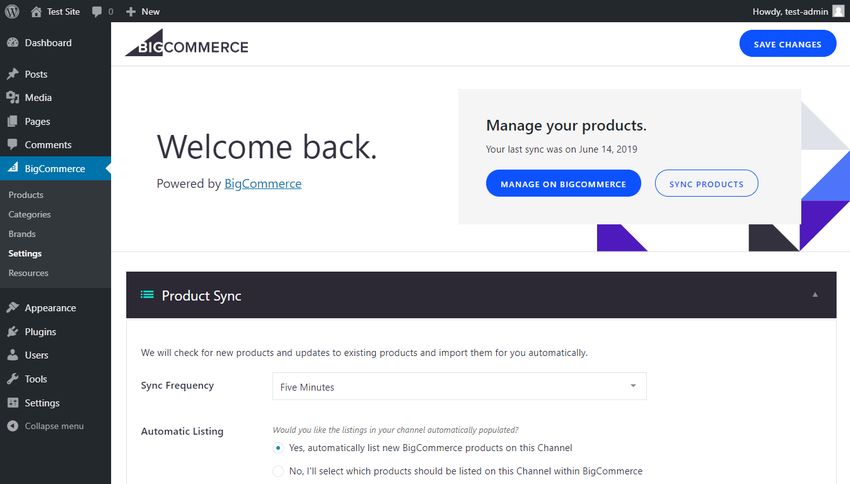
When the sync is done, the Welcome menu will be replaced with Settings where you can further configure your online store. Besides, your synced products will appear in the Products menu you can find in the left sidebar of your WordPress admin area.
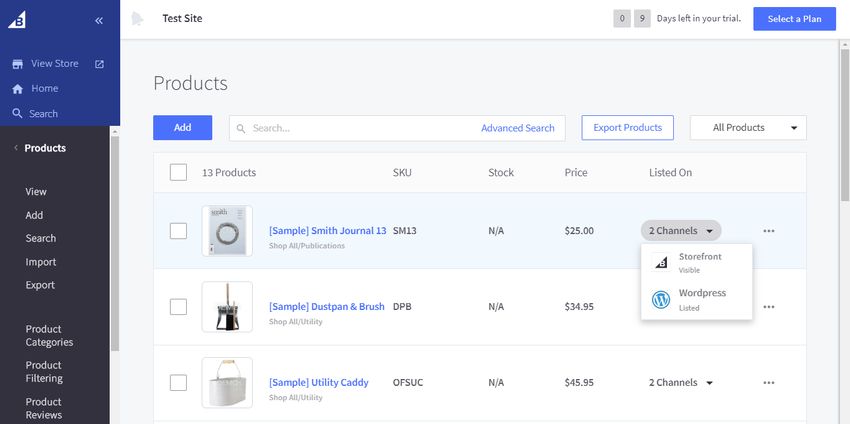
If you move back to your BigCommerce dashboard and click the Products menu in the left sidebar, you will see that now each product has two channels: Storefront (your in-app store available via the View Store menu) and WordPress. As the two platforms are connected, the API will automatically sync all changes.
Check Out the New Additions
1. New Custom Post Types
Besides the new Products custom post type, BigCommerce has also added other new content pieces to your site. If you have a look at your WordPress dashboard, you will see that you have two other custom post types as well: Categories and Brands.
Although you can see them in your WordPress admin area, you can only edit them from the BigCommerce dashboard. This is something that’s a bit hard to get used if you haven’t worked with a headless eCommerce solution before.
Always remember that if you want to change something related to the back-end of your store, you need to do it in the SaaS platform (which here is the BigCommerce dashboard) and the API will automatically sync it with your WP site.
For instance, here is how the Product Categories admin page looks like in WordPress:
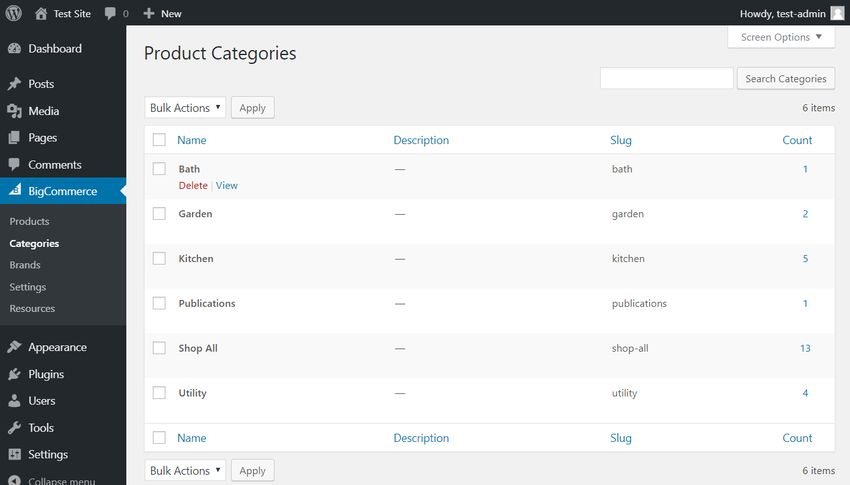
As you can see above, you can perform only two actions in the WordPress interface: Delete and View.
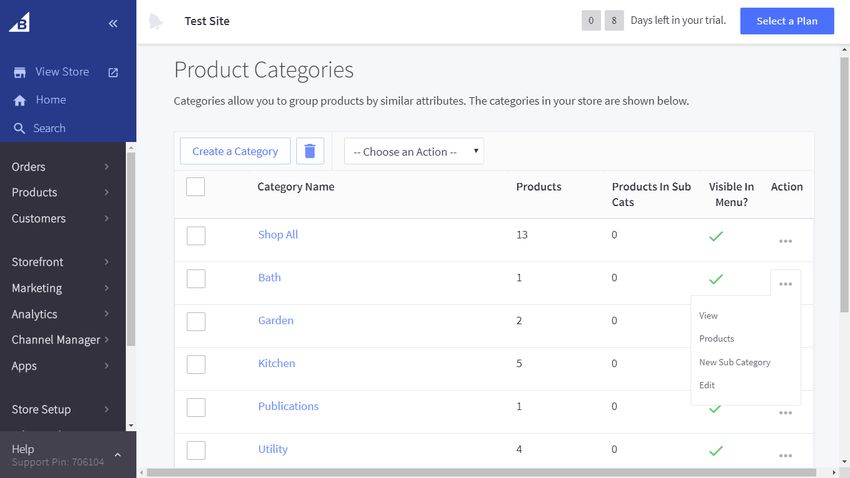
If you want to do more than that, for instance, adding a new category or editing an existing one, you need to perform it from BigCommerce’s corresponding Products > Product Categories menu:
2. New Shop Menu
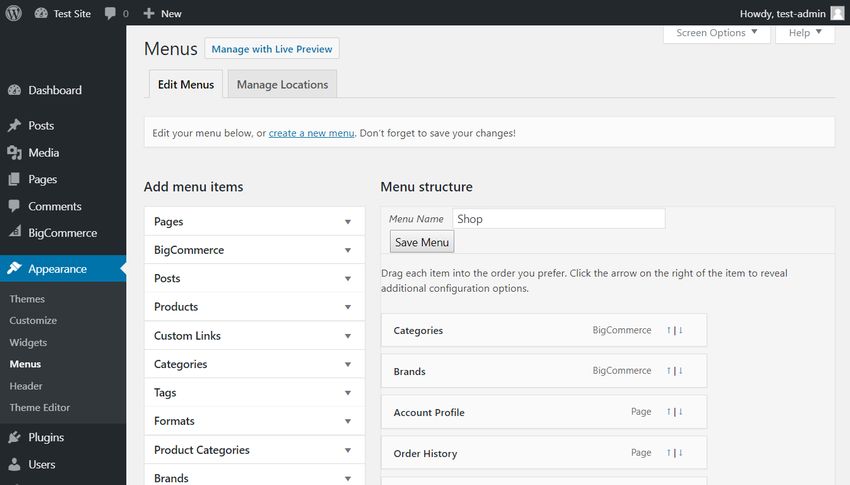
While connecting BigCommerce to your WordPress site, the API has also created a new Shop menu that you could configure during the initial syncing process. Now, you can add the new menu to any of your theme’s menu locations using your WP site’s Customizer.
As the Shop menu is only related to your WordPress site, you can edit it from the Appearance > Menu admin page, as you would do with any other WordPress menu:
3. New eCommerce Pages
If you have a look at the Pages menu in your WordPress admin area, you will see that the plugin has created new pages for a couple of eCommerce functionalities, respectively:
- login,
- account profile,
- addresses,
- cart,
- order history,
- privacy policy,
- gift certificate purchase,
- and shipping & returns.
These automatically generated pages use shortcodes and pull the necessary data securely from the database through the BigCommerce API. For example, the Order History page displays an individual customer’s previous orders based on the customer’s ID passed to the API during the login session.
Configure Your Settings
Although the WordPress plugin does have a Settings menu that you can find in the left sidebar, these are only settings specific to the WordPress channel. Here, you can configure simple things such as sync frequency, Google Analytics tracking, and price formats.
For platform-wide settings, you need to go to your BigCommerce dashboard. Here, you can configure literally anything related to your store, orders, products, customers, design, marketing, analytics, server, and many other functionalities.
You also get access to a Channel Manager where you can set up other popular eCommerce channels such as eBay, Facebook, Instagram, and Amazon. Note that the platform-wide settings you save in your BigCommerce dashboard will be applied to all of your channels. For example, if you change the Store Address, the new address will appear in all of your channels. This is the real beauty of headless eCommerce.
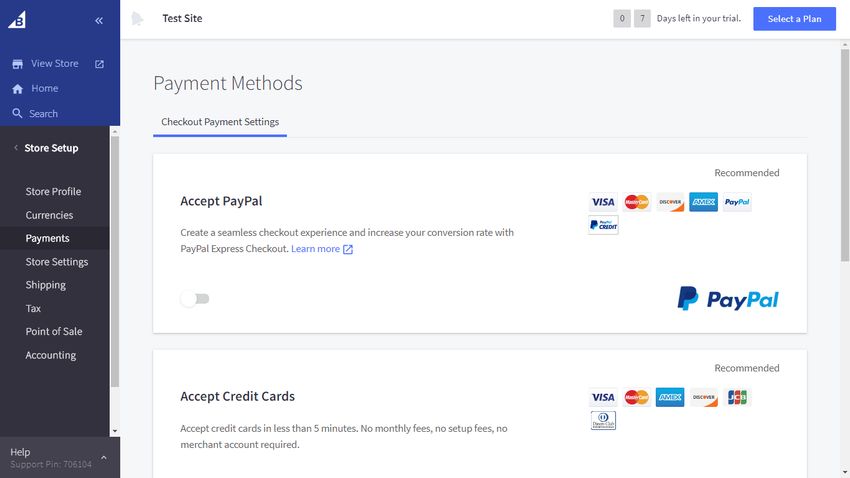
Although BigCommerce has a multitude of settings, you can find the most important ones under the Store Setup menu. You need to configure these settings by all means if you want to begin to run your store. Here, you can set up key parameters such as store profile, currencies, payment, shipping and tax details, and more. Note that if you want to use an embedded checkout, you’ll need to have an SSL certificate on your WordPress site.
Conclusion
BigCommerce provides you with a cutting-edge eCommerce solution you can use on both your WordPress site and other platforms, without any programming knowledge. You can even connect more than one WordPress sites to your BigCommerce back-end, so you can really sell your products at as many places as you want.
The only thing you need to pay attention to is that all data related to your store will be hosted on BigCommerce’s servers instead of being inside your WordPress database. This might cause some privacy issues you need to think about. In exchange, you get faster page loads, seamless syncing throughout many channels, and a professional dev team who takes care of all back-end functionalities.
If you’re looking for a professional eCommerce solution for your WordPress site, BigCommerce is definitely worth a try. The 15-day free trial period comes with no commitment and allows you to explore how the platform fits with your business needs.


