
Static website generators are increasingly popular these days. They make it possible to run a website without maintaining a database and a server. You also don’t have to worry about the updates and get rid of the majority of security problems as well. Static sites are ideal for presenting text-heavy content on the web, such as blogs. Currently, Jekyll is the most popular contender on the static site generator market. As GitHub Pages are powered by Jekyll, you can start a Jekyll blog on GitHub Pages for free.

1. Create a New Repository on GitHub
If you don’t yet have a GitHub account create one. Choose your username carefully, as it will be included in the default URL of your Jekyll blog. For instance, if your username is myjekyllblog the default URL of your blog will be myjekyllblog.github.io. Although it’s possible to use a custom URL on GitHub pages, it’s still better to choose a well-sounding username.
After you sign in to your GitHub account, you need to create a new repository where you will store the online version of your blog. Click the + button on the right-hand side of the top bar and choose the “New repository” option.

According to GitHub Pages’ rules, the name of the new repository should use the username.github.io format. For instance, as my username is myjekyllblog, I will use myjekyllblog.github.io as repository name.
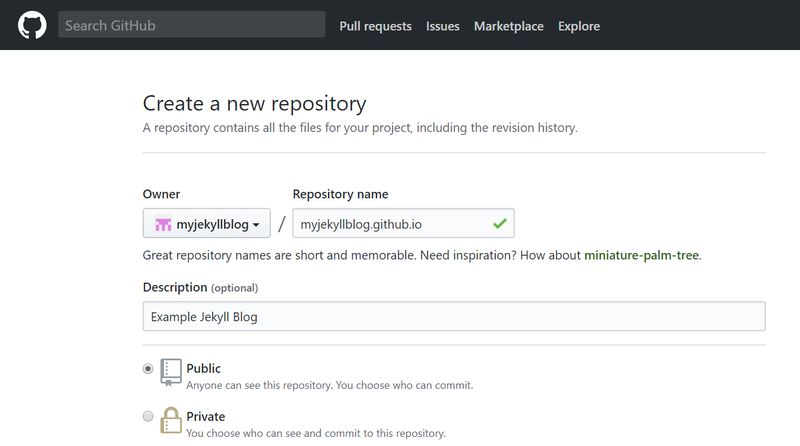
Hit the “Create repository” button, and GitHub will build your new repo on the https://github.com/username/username.github.io URL.
If you check the blog on the https://username.github.io GitHub page (where your Jekyll blog should reside) you will find a 404 error page there. That’s because you need to set up Jekyll engine separately.
2. Install Jekyll
As Jekyll is a static site generator, you have no server, database, and backend. To work with your Jekyll blog, you need to have a local copy of the site on your computer. You will create the blog posts and pages on your local machine. When they are done, you will upload them to the GitHub repo which is the online version of the site.
To be able to work with the local copy, you need to install Jekyll on your computer. As Jekyll is a Ruby gem, you need to have Ruby and RubyGems up and running. If you have a Unix system (Mac or Linux) you can simply use the command line (CLI) to install Jekyll.
On Windows machines, you need to use either the RubyInstaller or the Chocolatey package manager to install Ruby, as Ruby is not native to Windows. After installing Ruby and RubyGems with one of the package managers on your Windows system, you can use the same CLI command as on Mac or Linux. You can see how to install Ruby and RubyGems on the respective links of the package managers.
You can check if Ruby is installed on your computer by typing the following command into your command line:
ruby -v
If you have Ruby installed it simply returns the version number. Similarly, you can check if RubyGems is correctly up and running using the following command:
gem -v
If you have both requirements installed on your computer you can install Jekyll:
sudo gem install jekyll
When the installation is ready you can check if your Jekyll install is functioning correctly by typing the following command:
jekyll -v
If everything is fine the command line returns the version number of your Jekyll install.
3. Create a Jekyll Site
There are two ways to create a Jekyll site. If you want to perform the CSS styling by yourself you can create a default Jekyll site. Or, if you prefer to use an existing Jekyll theme you can simply clone it from GitHub.
To create a default Jekyll site, open your command line and navigate into the folder where you want to store the local copy of your Jekyll blog. When you are inside the folder, run the following command:
jekyll new myjekyllblog
In the command above, myjekyllblog is the name of the folder in which your computer will store the local version of your Jekyll blog. You can use any other folder name instead. When the installation is ready, you can see in your File Manager that Jekyll has created a new folder.
Enter the new folder in the command line and run the following command in order to make the local Jekyll server work:
jekyll serve --watch
Now, you can access the local copy of your blog on the localhost:4000 URL (Jekyll uses port 4000). You can see that Jekyll has created a very basic-looking blog, with one blog post and an About page:
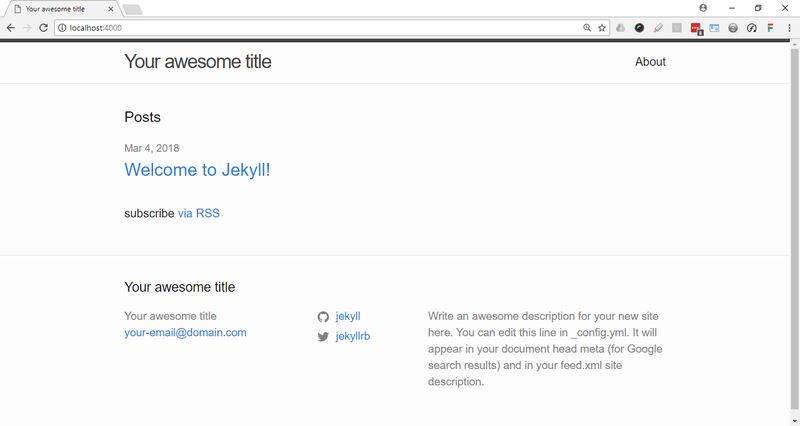
If you just need a simple blog and are happy with this basic looks you are good to go. If not you can create a CSS stylesheet and customize the looks. You can read here in the docs how you can customize the CSS of your Jekyll blog.
You can also use a pre-made Jekyll theme. You can find free and premium Jekyll themes ifn several different places on the internet, such as JekyllThemes.org, JekyllThemes.io, JekyllRC.org, and others. GitHub also has a collection where you can find free Jekyll themes. After you found the theme you like, simply follow the instructions in the docs or readme file.
4. Change the Configurations
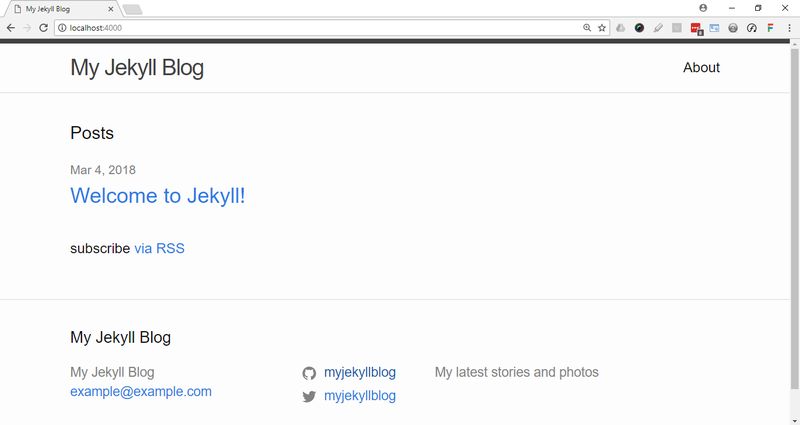
Your Jekyll blog’s configurations reside in the _config.yml file. When you install Jekyll it comes with a default config. Open the file in a code editor and change the values. For instance:
title: My Jekyll Blog
email: example@example.com
description: My latest stories and photos
url: https://myjekyllblog.github.io
twitter_username: myjekyllblog
github_username: myjekyllblog
To see the changes on your local site, you have to restart the Jekyll server. Exit from the current session and rerun the jekyll serve --watch command. You can see that the values have been updated on your Jekyll blog:
5. Add Blog Posts
The Jekyll templating engine follows strict naming rules. You need to place your new blog posts into the _posts folder. The names of the blog posts need to use the following naming convention:
year-month-date-{slug}.md
For instance, if you want to create a blog post on March 04, 2018 with the title of “I Know How to Use Jekyll” the file name will be the following (however you could use a shorter slug as well):
2018-03-04-i-know-how-to-use-jekyll.md
When you start to write a new blog post, you also need to define the title and the post layout separately. Although the default Jekyll theme has only one blog post layout called post, other themes can have more than one.
To write a new blog post, create a new file in your _posts folder and name it with the aforementioned naming convention. For instance, my file will be _posts/2018-03-04-i-know-how-to-use-jekyll.md. The .md file extension stands for a Markdown file which is the syntax Jekyll uses.
Open the new file in a code editor and start it with the following lines:
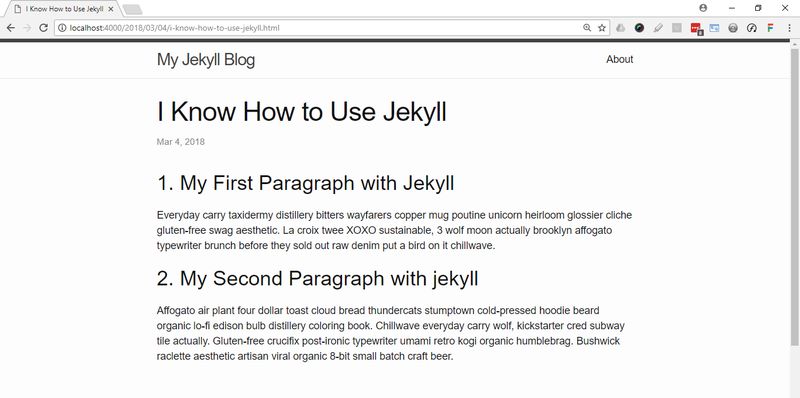
---
layout: post
title: "I Know How to Use Jekyll"
---
Below the definitions of the title and layout, you can simply add your content in Markdown format. I will add some gibberish text with Hipster Ipsum to my Jekyll blog and refresh the site. Note that here you don’t have to restart the server, as you haven’t changed the config. It’s enough to just refresh the browser. As you can see below, the new blog post has been added to the blog:
6. Push the Site Live
When you are content with the looks of your blog, you need to push it to the GitHub Pages. In your command line, run the git status command to check the status of your repo. If you get an error message that tells “Not a git repository” you need to initialize Git in the blog’s root folder with the following command:
git init
Then, you need to track and commit the files:
git add .
git commit -m "Initial commit"
I used “Initial commit” as commit message but you can use anything else instead. If you just want to commit a single blog post it’s a good idea to use the title of the post.
Now, you need to add the URL of your GitHub repo as remote repository, using the following command:
git remote add origin https://github.com/myjekyllblog/myjekyllblog.github.io
Finally, you can push the changes live to GitHub. Before you push the changes online, you may be asked to type your GitHub username and password into the command line.
git push origin master
And voila, your Jekyll blog is live and the new post is published on your live Github.io domain! If you want to use a custom domain instead of Github.io, have a look at my blog post about how to properly configure your DNS records.
Learn More
You can read more about how Jekyll works in the official Jekyll Docs. They have a lot of information on how to create custom CSS, templates, post types, and a lot of other things. To learn more on static website generators in general, have a look at our previous article on the best tools and resources to build a static website. And, if you are interested in how to start a blog check out our step-by-step guide.
Finally, don’t forget to follow us on Facebook and Twitter to get notified about the latest web development tips, tricks, and reviews.


