
Looking for a way to share location-based weather reports and forecasts with your website visitors? You’re going to need access to up-to-date, accurate weather data first – and Weatherstack can provide it.
In this Weatherstack review, we’re going to telling you everything you need to know about this useful free API and how you can use it to add weather data to your website.
Ready? Let’s get started!
What is Weatherstack?
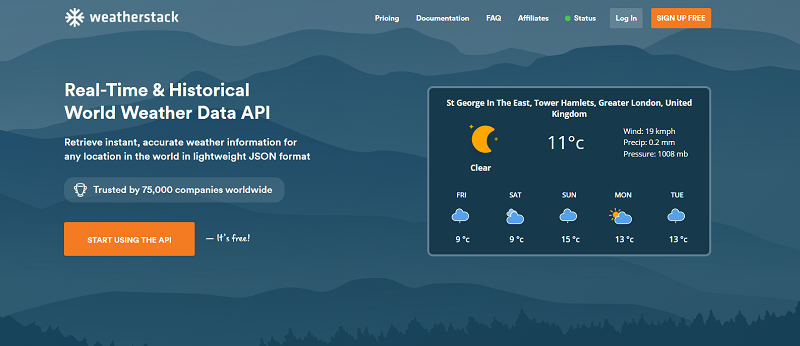
Weatherstack is a weather API from the SaaS and API provider Apilayer. The API is designed to provide weather updates in-realtime. The API uses licensed weather data from stations across the world to provide accurate and consistent weather reports.
With the help of the Weatherstack API, you can display current, past, and future weather data on your site to help your visitors stay in the know.
Whilst it’s not the only weather API out there, Weatherstack is a great option, as it’s extremely reliable and well developed. According to Apilayer, it has a 99% up rate – not bad right?
Weatherstack is a powerful tool that can be utilized by businesses looking to provide their website visitors with accurate, on-demand weather data. Whether you run a small holiday business or hotel, a ski school, or an outdoor restaurant, Weatherstack API can help to improve your customer’s on and off-page experience.
Let’s take a closer look at some of Weatherstacks’ features.
Weatherstack Features
Weatherstack has a range of features that make it an extremely useful weather API. Here are some of the stand-out features of Weatherstack.
Real-time weather reports
The main benefit of Weatherstack is that it can help you display real-time weather reports on your site. You won’t have to worry that the information you are providing is outdated, as all the information updates at the time of each request. All the data is collected from reliable weather stations to ensure accuracy and consistency
Historical Weather Data
Aside from real-time reports, Weatherstack can also be used to pull historical weather data. You can use Weatherstack to pull all the data from a specific date range or view historical weather data from any time.
7,10 or 14-day weather forecasting
The paid plans also include forecasting features. Depending on the plan you choose, you can use Weatherstack to pull data from the last 7,10, or 14 days. This feature is great for businesses involved with weather dependant activities such as outdoor sports or vacation rentals.
Location look-up
Weatherstack’s location lookup feature can be used to pull weather data from multiple locations. Whether you’re in Kentucky or Korea, you can use Weatherstack to get on-demand weather updates
Supports 40 different languages
Weatherstack can be used to request weather data in a variety of different languages. Weatherstack supports 40 different languages including English, Chinese, Spanish and Arabic.
Can be used with a variety of programming languages
Weatherstack works with a variety of different programming languages including PHP, jQuery, Python, Ruby, Go, and Nodejs. You can find information about implementing Weatherstack using your chosen coding language on their website in the Documentation section.
WeatherStack Pricing
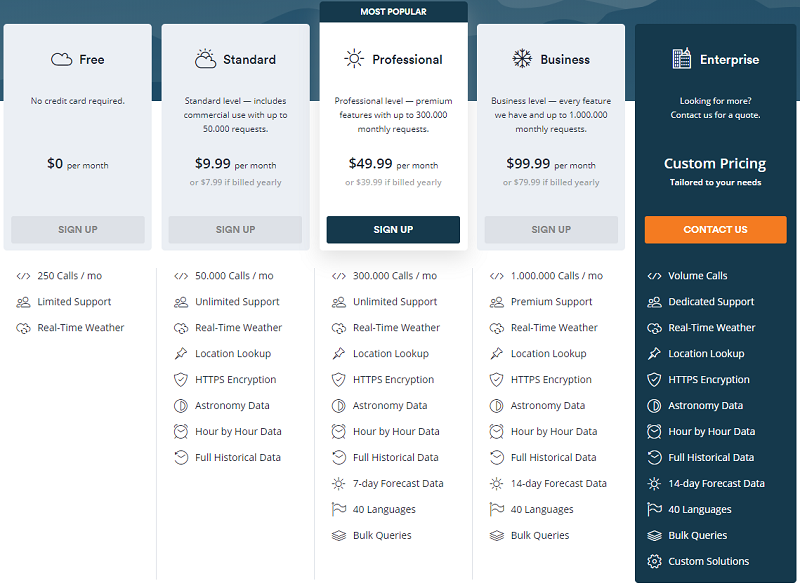
Weatherstack has 3 different paid plans, as well as a free plan. You can get started with no credit card required. Here’s a rundown of the different plans, and what they offer.
Weatherstack Free Plan
The Weatherstack free plan is suitable for familiarising yourself with the product. The free plan allows you 250 ‘calls’ or API requests. Anytime the API is used to look up the weather is classed as 1 call. If the lookup fails, it’s not deducted from your quota.
Although this plan is free, it’s not as full-featured as the paid plans, and therefore is most suitable for people that just want to trial the product.
Weatherstack Standard Plan
The standard plan is the cheapest of the 3 plans. At $9.99 a month, it comes with a quota of 50,000 calls as well as unlimited support. Some of the other features you get access to include:
- Location lookup
- Historical data
- Hour-by-Hour data
- Astronomy data
The standard plan is suitable for sites with smaller search traffic, and users that don’t need access to future forecast data.
Weatherstack Professional Plan
The Weatherstack Professional Plan is the mid-range option and includes 300,000 calls per month. The plan costs $49.99 and includes some additional features like:
- 7-day forecast data
- Bulk queries
- 40 different languages
This plan is a great option for larger sites with high traffic volumes. It’s also a necessity if you want to make use of the future forecasting features, or if you have a multilingual site.
Weatherstack Business Plan
The Weatherstack business plan is the most expensive option at $99.99 per month. The main benefit of this plan is that it includes 1,000,000 calls per month, and comes with premium support. This plan includes everything that is available in the standard and professional plans, plus 14-day forecast data.
All plans are discounted by 20% if you choose the yearly payment option.
How WeatherStack works
Once you’ve signed up for a Weatherstack account, you’ll be given access to a Weatherstack API key. This is a personal key that authenticates you with the Weatherstack API and allows you to make API calls, kind of like a password.
Once you have your API key, you can make an API call using whatever language and method you choose. You can try it out initially in your browser window with a browser extension like JSON viewer to help you make sense of the returned data.
The idea is to send a get request to either api.weatherstack.com/current, api.weatherstack.com/historical, or api.weatherstack/forecast, depending on whether you want current, historical, or future weather information (add the https:// prefix for encryption).
You also need to include a few required parameters alongside your get request, including your API key, query, and location (or multiple locations).
A basic API request should look something like this:
http://api.weatherstack.com/current
? access_key = YOUR_ACCESS_KEY
& query = New York
The basic API output will include a lot of information about the current weather for your specific location.
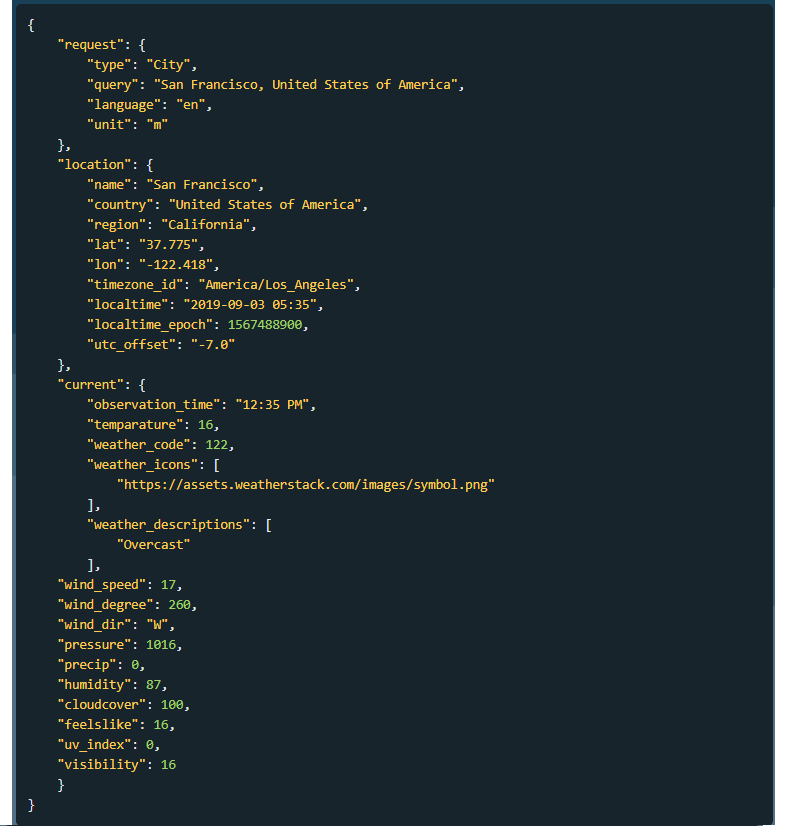
You can also add extra optional parameters like units, language, number of days, etc. for more specific requests (see below). This aids with website localization and allows developers to implement weather information in the local language of their users, and in units that they’re familiar with.
// optional parameters:
& units = m
& language = fr
& callback = MY_CALLBACK
You can also access the Historical Weather API endpoint to grab historical weather information between two specific dates. Here’s an example of what that request looks like:
// Historical Weather API Endpoint
http://api.weatherstack.com/historical
? access_key = YOUR_ACCESS_KEY
& query = New York
& historical_date = 2016-14-05
// optional parameters:
& hourly = 1
& interval = 3
& units = m
& language = fr
& callback = MY_CALLBACK
As you can see, there are a few more parameters here including hourly, interval, and historical date.
The hourly parameter determines whether or not you’ll receive hourly information and consists of either a 1 (on) or 0 (off) value. The interval parameter specifies the hour increments you want values for, and the historical data parameter can consist of a date range (multiple dates separated by a semicolon) or a single past date.
How to use WeatherStack on your website to display real-time weather forecasts
The Weatherstack API is a tool for developers. If you want to use it to show weather information on your WordPress website, It’s not as simple as just installing a plugin – you’re going to have to do some custom web development work.
Therefore, if you’re not a professional developer, you might struggle here.
The API is there to provide access to data collated from leading weather stations. It’s up to you to develop a tool capable of accessing the API endpoint, formatting the JSON output, and displaying it to your website users.
There are different ways to go about this. For example, if you’re comfortable with coding languages like PHP, jQuery, Python, and Nodejs, you can use the data in an app or display it on your website pages. If you want to use it on your website pages, you’ll need some style elements to aid with readability.
If you want more information on how to use the Weatherstack API, we’d recommend referring to the Weatherstack API documentation. It includes detailed instructions and interactive code examples in all the major programming languages.
Final thoughts
That just about covers everything there is to know about the WeatherStack API. We hope you found this WeatherStack review useful and that it helped you to understand how it all works a little better.